Insect Netting: A Simple Guide to Chemical-Free Garden Protection
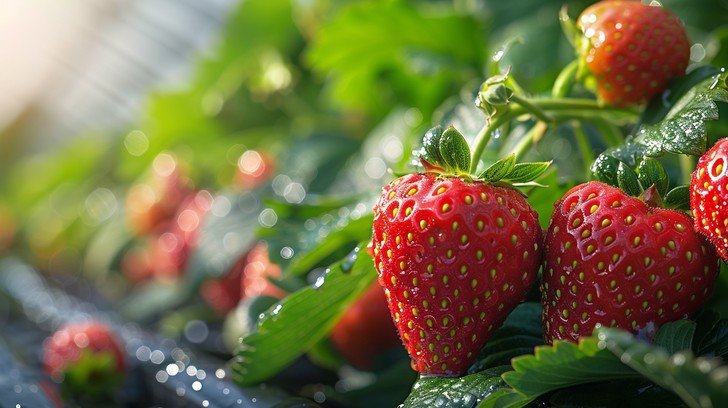
For many gardeners, the sight of pests on their plants is a constant source of frustration. Cabbage moths fluttering over broccoli, aphids clustering on rose buds, and flea beetles peppering eggplant leaves can threaten months of hard work. While chemical pesticides offer one solution, they can harm beneficial insects, soil health, and the environment. Fortunately, there is a highly effective, non-toxic alternative: insect netting.
This physical barrier method is a powerful tool for any gardener looking to protect their crops without resorting to sprays. This comprehensive guide will walk you through everything you need to know about insect netting, from how it works and its many benefits to a step-by-step guide on installing it in your own garden.
What is Insect Netting?
Insect netting is a lightweight, woven mesh fabric designed to create a protective barrier over plants. It is typically made from polyethylene or polypropylene and is designed to be durable, UV-stabilized to withstand sun exposure, and lightweight enough to rest directly on plants or be supported by hoops.
The key to its effectiveness lies in the mesh size the tiny gaps between the threads. This size is carefully calibrated to be small enough to block specific pests from passing through while still allowing sunlight, air, and water to reach the plants. Think of it as a microscopic sieve that keeps the bad bugs out but lets all the good elements of nature in.
How Does Insect Netting Work?
The principle behind insect netting is beautifully simple: it acts as a physical barrier that prevents pests from reaching your plants to lay eggs or feed.
Adult insects like cabbage root flies, carrot rust flies, and cabbage white butterflies cannot penetrate the mesh to deposit their eggs on the leaves or soil. Without access, their life cycle is interrupted, and the damaging larval stage never occurs. Similarly, the netting stops larger pests like birds and rabbits from nibbling on your seedlings and fruits.
Unlike pesticides that kill pests after they have arrived, insect netting is a proactive method of exclusion. It stops the problem before it starts, creating a safe zone for your plants to grow and thrive. For more general garden care tips, you can explore our other guides on GardenKT.com.
The Key Benefits of Using Insect Netting in Your Garden
Choosing to use insect netting offers a wide array of advantages for both the home gardener and the larger ecosystem.
1. Effective, Chemical-Free Pest Control
This is the most significant benefit. Insect netting provides excellent protection against a wide range of pests without a single drop of spray. This means you can grow healthy, organic produce and not worry about chemical residues on your food.
2. Protection for Beneficial Insects
Pesticides are non-discriminatory; they kill pollinating bees, ladybugs, and other beneficial insects alongside the pests. Since insect netting is a physical barrier, it does not harm these helpful garden allies. You can create a protected environment for your crops while still supporting a healthy ecosystem elsewhere in your garden.
3. Improved Plant Growth and Yield
By preventing pest damage, plants are less stressed and can direct more energy into growth and fruit production. You will often see larger, unblemished vegetables and a more reliable harvest.
4. Protection from Birds and Small Animals
The same netting that stops insects can also deter birds from eating your berries and rabbits from munching on your lettuce, offering multi-layered protection.
5. Can Provide Mild Shade and Frost Protection
Depending on the density, insect netting can offer a slight amount of shade during the hottest part of the day, reducing plant stress. A heavier grade mesh can also provide a degree of frost protection by trapping a layer of still air near the plants, similar to how frost cloth works.
Choosing the Right Insect Netting: Mesh Size is Everything
Not all netting is the same. The single most important factor to consider is the mesh size, which determines which pests you can effectively exclude.
Standard Mesh (approx. 0.8mm x 0.8mm or smaller):
This is the most common and versatile type of insect netting.
-
Pests Blocked: Cabbage white butterfly, cabbage root fly, carrot rust fly, aphids, leaf miners, and flea beetles.
-
Best For: The majority of vegetable crops, including brassicas (cabbage, broccoli, kale), carrots, and lettuces.
Extra-Fine Mesh (approx. 0.4mm x 0.4mm):
This is a much tighter weave designed for the tiniest of pests.
-
Pests Blocked: Thrips, psyllids, and midges. It is also highly effective against aphids.
-
Considerations: While offering superior protection, the finer mesh can reduce light penetration and air flow slightly more than standard mesh, so good support is crucial.
When selecting your netting, always match the mesh size to your most problematic pest. For instance, if thrips are your primary concern, you will need extra-fine mesh. For general garden use, a standard mesh is an excellent choice. Reputable suppliers like Bootstrap Farmer provide detailed specifications to help you choose.
How to Install Insect Netting in Your Garden
Proper installation is key to making insect netting effective. A single gap is all it takes for pests to find their way in.
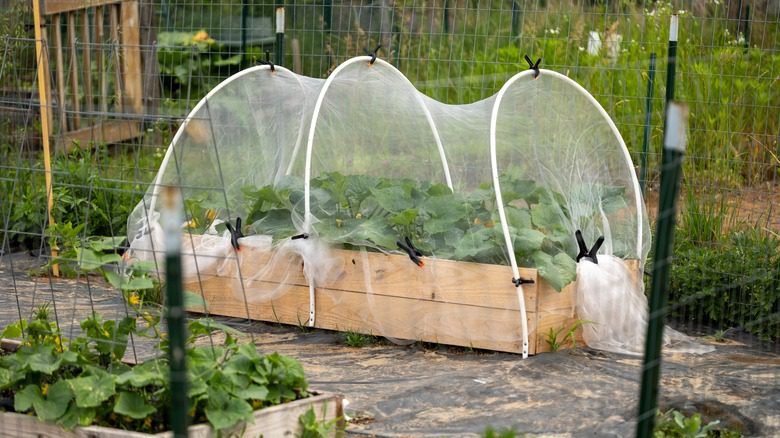
Method 1: Supported with Hoops (Recommended)
This is the best method as it prevents the netting from resting on the plants, which pests can still feed through.
Step 1: Build a Support Structure
Create a series of hoops over your garden bed. You can use flexible materials like PVC conduit, metal electrical conduit, or sturdy wire. Push the ends of the hoops into the soil, spacing them about 4 to 5 feet apart.
Step 2: Drape the Netting
Lay the insect netting over the entire support structure, allowing plenty of excess material to reach the ground on all sides.
Step 3: Secure the Edges Completely
This is the most critical step. You must seal the bottom edges thoroughly. There are several ways to do this:
-
Bury the Edges: Bury the excess netting in a shallow trench around the bed.
-
Weigh it Down: Use long sandbags, lumber, or rocks to hold the edges firmly against the soil.
-
U-Pins: Use landscape fabric pins or U-pins to secure the netting to the ground every foot or so.
Step 4: Secure the Ends
Gather the ends of the netting and tie them off or secure them with clips to prevent any openings.
Method 2: Floating Row Cover
For direct-sown crops like carrots or beets, you can lay the insect netting directly on top of the seedlings. As the plants grow, they will lift the netting with them. Ensure the edges are securely weighted down as described above.
https://gardenkt.com/images/insect-netting-tunnel.jpg
Alt Text: Insect netting supported by hoops forming a protective tunnel over a vegetable garden bed.
Which Crops Benefit Most from Insect Netting?
While many plants can be protected, some see particularly dramatic results.
-
Brassicas (Cabbage, Broccoli, Kale, etc.): Essential for protecting against cabbage white butterflies and their destructive caterpillars.
-
Root Vegetables (Carrots, Parsnips): Prevents carrot rust fly maggots from tunneling into your roots.
-
Squash and Cucumbers: Can help reduce damage from squash bugs and cucumber beetles if installed early.
-
Leafy Greens (Lettuce, Spinach, Swiss Chard): Protects from leaf miners and flea beetles.
-
Fruit Bushes (Blueberries, Currants): Excellent for keeping birds from stealing your ripe fruit.
For other garden protection methods, such as shielding plants from cold, you can learn about using frost cloth material in our other guides.
Managing Pollination Under Netting
A common concern is that insect netting will prevent pollination. This is a valid consideration, but it is easily managed.
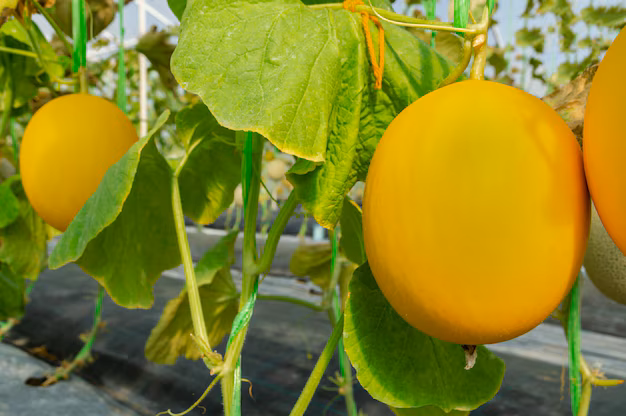
For crops that require insect pollination, such as squash, cucumbers, and melons, you have two options:
-
Remove the Netting During Flowering: Once the plants begin to flower, you can temporarily remove the netting during the day to allow bees and other pollinators access. Replace it in the evening.
-
Hand Pollinate: You can learn to hand-pollinate these plants while they remain under protection. This is a simple and effective process.
Self-pollinating crops like tomatoes, peppers, and beans do not require insect assistance and will produce fruit perfectly well under insect netting.
Common Mistakes to Avoid
-
Gaps in Coverage: The number one mistake is failing to secure the edges completely. Check regularly for and seal any gaps.
-
Touching the Foliage: Allowing the netting to rest on plants gives pests a platform to feed from the other side. Always use supports.
-
Using the Wrong Mesh Size: A mesh that is too large will let your target pests through, rendering the netting useless.
-
Ignoring Weeding: Weeds that grow inside the protected area can still harbor pests. Keep the area under the netting weeded.
-
Poor Timing: Install the netting before pests become a problem. It is a preventative tool, not a cure.
For more advanced insights into integrated pest management, the Royal Horticultural Society offers a detailed resource on insect-proof mesh and its uses.
Caring for and Storing Your Insect Netting
With proper care, a quality insect netting can last for several seasons.
-
Cleaning: Gently shake off debris and rinse with a hose. Avoid harsh scrubbing that could damage the mesh.
-
Drying: Always allow the netting to dry completely before folding and storing it to prevent mildew.
-
Storage: Fold it neatly and store it in a cool, dry place, safe from rodents.
Conclusion: A Smart Investment for a Healthy Garden
Insect netting is more than just a piece of fabric; it is a strategy for peaceful, productive gardening. It empowers you to take control of pest problems in a way that is safe, effective, and harmonious with nature. By creating a simple barrier, you can save time, and money on pesticides, and enjoy the satisfaction of harvesting beautiful, undamaged produce.
Whether you are a seasoned vegetable grower or a beginner with a few containers, integrating insect netting into your garden plan is one of the smartest decisions you can make. It offers a clear path to healthier plants and more abundant harvests, all while caring for the environment in your backyard.