Welcome to Garden KT, your resource for mastering the art of indoor gardening. If you are seeking a houseplant that offers long-lasting, vibrant color with minimal fuss, look no further than the Bromeliad. These beauties, native to tropical and subtropical regions of the Americas, provide an extraordinary splash of color and architectural elegance that can last for months.
Despite their elaborate appearance, Bromeliads are remarkably resilient, making them fantastic choices for both novice and experienced plant enthusiasts. However, because their growth habits differ significantly from standard foliage houseplants, understanding the unique principles of proper bromeliad care is essential. These plants have distinct needs when it comes to watering, light, and soil, all stemming from their unusual life cycle as epiphytes (plants that naturally grow on trees, not in the soil).
This comprehensive, over 2000-word guide is designed to walk you through every aspect of successful bromeliad care. We will dissect their specialized anatomy, detail the critical “tank” watering method, and explain the fascinating life cycle that culminates in the birth of new plants, ensuring your Bromeliad thrives and continues to surprise you with its tropical charm.
Understanding the Bromeliad: A Unique Anatomy
To provide the best bromeliad care, it helps to understand how these plants function in their native environment. Most common indoor bromeliads, such as Guzmania and Vriesea, are epiphytes; they use their roots only to anchor themselves to tree bark or rocks, not to absorb significant amounts of water or nutrients.
The Specialized Bromeliad Structure
- The Leaf Rosette: The leaves grow tightly packed in a cylindrical, funnel-like spiral called a rosette. This is the plant’s primary water collection system.
- The Central Tank (or Cup): The tightly overlapping leaves form a central reservoir that collects and stores rainwater. This “tank” is where the plant absorbs the majority of its moisture and nutrients through specialized scales on the leaves. This tank is the center of your regular bromeliad care routine.
- The Root System: The roots are small, sparse, and used mainly for stability. Consequently, the soil needs of a Bromeliad focus entirely on excellent drainage and aeration.
- The Inflorescence (Flower): What most people call the Bromeliad’s “flower” is actually a colorful, modified cluster of leaves called the bracts (or inflorescence), which typically last much longer than the small, actual flowers they surround.
Understanding this structure is the basis of effective bromeliad care: the plant is designed to collect moisture in its cup and absorb nutrients through its leaves, not its roots.
The Life Cycle: A Crucial Element of Bromeliad Care
Bromeliads are monocarpic, meaning they flower only once in their lifetime. This is the most crucial piece of information for long-term bromeliad care.
The Three Phases of Bromeliad Life:
- Growth Phase (Years 1-3): The plant grows its rosette, establishing itself until it is large enough to support a bloom. The goal of your bromeliad care during this phase is purely healthy foliage.
- Flowering Phase (Months 1-8): Once mature, the plant produces its stunning inflorescence (bracts), which can last for several months. During this time, the plant begins to decline subtly.
- Decline and Pups Phase (Post-Bloom): After the flower begins to fade, the “mother plant” slowly dies. This is completely natural and unavoidable. However, before it expires, the mother plant channels all its remaining energy into producing offsets (or “pups”) around its base. The next phase of your bromeliad care involves nurturing these pups to start the cycle anew.
Essential Bromeliad Care Requirements
Successfully growing a Bromeliad indoors relies on mimicking the light, humidity, and moisture conditions of the tropical forest canopy.
1. Light: Bright, Indirect Light is Ideal
Bromeliads require bright light, but due to their habit of growing under the canopy of larger trees, they generally need this light to be filtered or indirect.
- Optimal Placement: An east-facing window (morning sun) or a location a few feet back from a bright south or west-facing window is perfect for good bromeliad care.
- Reading the Leaves: The appearance of the leaves can tell you a lot about your current bromeliad care routine:
- Soft, plain green leaves (like Guzmania): Prefer shadier conditions. Too much direct sun can scorch the leaves.
- Stiff, waxy, or mottled leaves (like Aechmea or Neoregelia): Tolerate brighter light and even some direct morning sun, which often helps maintain their vibrant color and patterning.
- Insufficient Light: Too little light will cause the plant to lose color, become droopy, and fail to flower. If you notice your Bromeliad stretching out or losing its vibrant bract color, it likely needs brighter conditions. The best bromeliad care always involves balancing bright light without scorching.
2. Watering: The Tank Method
This is the most unique and critical element of proper bromeliad care and the area where most beginners make mistakes.
A. Watering the Tank
- Fill the Tank: The central cup should be kept approximately one-quarter to one-half full of clean water during the spring and summer growing season.
- Flush the Tank: Do not let the water sit indefinitely. Stale water can harbor bacteria and lead to rot. Once a week, tip the Bromeliad to empty the old water, and then immediately refill it with fresh water. This simple step is vital for avoiding the dreaded central cup rot in bromeliad care.
- Water Quality: Bromeliads are sensitive to the high mineral content and chlorine found in tap water. If possible, use collected rainwater, distilled water, or tap water that has been left uncovered overnight to allow chlorine to dissipate.
B. Watering the Soil
- Sparingly: Because the roots are mainly for anchoring, the soil should be watered only when it is nearly completely dry. Overwatering the soil is a direct path to root rot.
- Winter Reduction: During the cooler, lower-light winter months, reduce watering both the cup and the soil, allowing them to remain drier, but never completely dehydrated. This reduction in watering is a key seasonal adjustment in bromeliad care.
3. Humidity and Temperature
Being tropical natives, Bromeliads thrive in warm, humid conditions.
- Temperature: Maintain temperatures between 60°F and 80°F (15°C to 27°C). They must be protected from frost and sudden cold drafts. Consistent warmth is non-negotiable for high-quality bromeliad care.
- Humidity: High humidity is appreciated. If your indoor air is dry, you can supplement by grouping the plant with other plants or using a pebble tray filled with water beneath the pot. Misting the leaves can help, but regular flushing of the central cup is a more effective way to increase humidity around the plant’s absorption points.
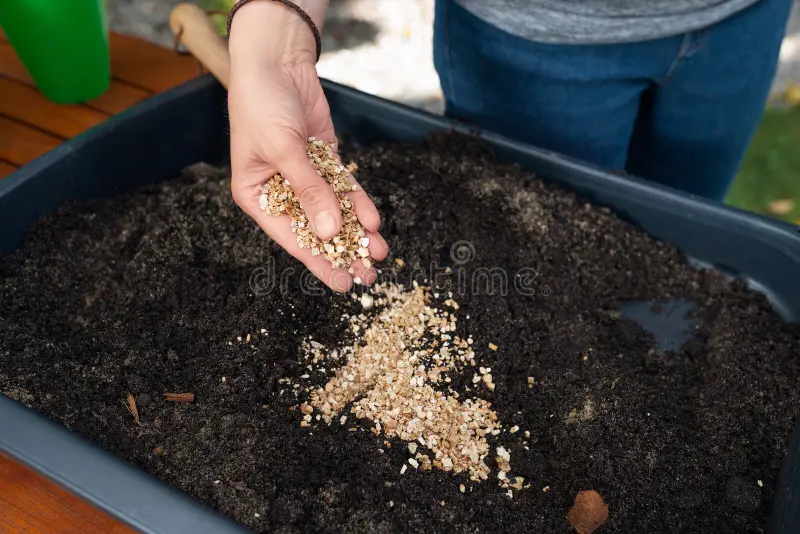
4. Soil and Potting
Since the roots are used primarily for support, the soil mix must be exceptionally well-draining.
- Soil Mix: Do not use standard potting soil. Opt for a coarse, loose mix designed for orchids or epiphytes. A mixture of orchid bark, peat moss, and perlite works well. This mix ensures rapid drainage and excellent air circulation around the roots, preventing root death. This is a foundational aspect of proper bromeliad care.
- Pot Size: Bromeliads have small root systems and are happiest when they are slightly root-bound. Choose a relatively small, heavy pot to provide stability for the tall inflorescence without housing excessive amounts of unnecessary, moisture-retaining soil.
Advanced Bromeliad Care and Maintenance
Moving beyond the basics, these tips will help you manage the plant’s unique life cycle, including fertilization and the transition to the pup stage.
1. Fertilization: Less is More
Bromeliads are very light feeders. Over-fertilizing can easily burn the leaves or lead to weak, rapid growth.
- Method 1 (In the Tank): Apply a balanced liquid fertilizer (such as 10-10-10) diluted to one-eighth to one-quarter strength once a month during the growing season (spring and summer). Pour a tiny amount into the central cup, ensuring it is flushed out when you change the water a week later.
- Method 2 (Foliar Spray): Alternatively, dissolve the diluted fertilizer in water and spray it directly onto the leaves, allowing the plant to absorb nutrients through its scales.
- Never Fertilize in Winter: Discontinue all feeding when light levels are low and growth has slowed. This simplified bromeliad care routine prevents fertilizer salts from building up.
2. Encouraging a Flower
Most commercially sold Bromeliads are already mature or in bloom. However, if you have a young plant and are waiting for that spectacular moment, you can try to induce flowering.
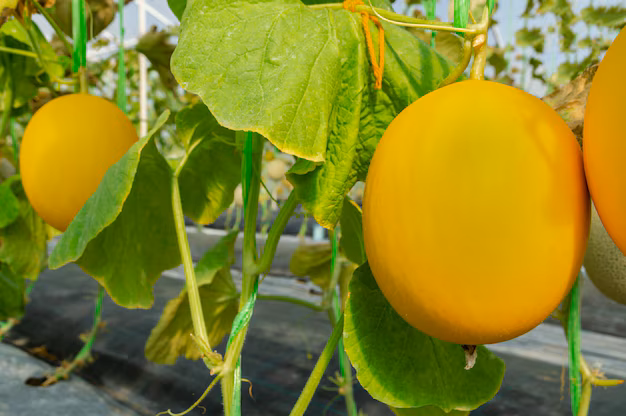
- The Apple Trick: Place the Bromeliad and a ripe apple (or banana peel) together in a clear plastic bag. Seal the bag and place it in a bright, warm location for 7 to 10 days. As the fruit breaks down, it releases ethylene gas, which is a natural plant hormone that can trigger bloom production.
- Patience: Remember that the plant must be physiologically mature first, which can take up to three years, regardless of the apple trick. Consistent and diligent bromeliad care is the best way to achieve maturity.
3. The Death of the Mother Plant
After the colorful bracts fade, the mother plant will slowly begin to turn brown and dry out, usually over several months to a year.
- What to Do: Do not cut the entire plant down immediately. As long as the mother is still green, it is channeling energy and nutrients into the developing pups. Your focus should shift entirely to pup care while still maintaining the mother.
- When to Prune: Once the mother plant is entirely brown and dry, you can use sterilized shears to cut it back to the soil line, making room for the new pups to grow. This is the natural and final step in the mother plant’s lifecycle and a key component of long-term bromeliad care.
Propagation: The Next Generation of Bromeliads
The propagation of Bromeliads is not done through seeds or cuttings, but through the separation of the naturally occurring pups. This process ensures the continuity of your plant collection.
Separating and Potting the Pups
- Wait for Size: The most common mistake in bromeliad care and propagation is removing the pup too early. Wait until the pup is at least one-third to one-half the size of the mother plant and has developed a few leaves of its own. This size ensures the pup has enough stored energy and surface area to survive on its own.
- Separate: Use a long, sharp, sterilized knife to cut the pup away from the mother plant’s base, trying to ensure the pup has some root tissue attached. If the pup is easily wiggled off, it may already have roots and be ready.
- Callous: After separation, allow the pup to sit in a dry, shaded place for 2 to 5 days. This resting period allows the cut area to dry and form a protective seal, or “callous,” which is crucial for preventing fatal rot when the pup is potted.
- Potting: Plant the calloused pup in a small pot using the coarse, fast-draining orchid or bromeliad mix. Do not plant it too deeply; the base should rest just on the surface of the soil. You may need to use stakes to secure it until roots develop.
- Initial Watering: Water the soil sparingly and add a small amount of water to the pup’s tank. Resume your normal bromeliad care routine (bright, indirect light) once the pup is secured in its new home.
Troubleshooting Common Bromeliad Care Problems
Bromeliads are generally pest and disease resistant, but a few issues can arise, usually due to incorrect watering practices.
| Symptom | Cause | Solution |
| Brown, Crispy Leaf Tips | Low humidity or underwatering. | Increase ambient humidity around the plant and ensure the tank is filled (and flushed regularly). |
| Brown or Black Spots in the Center Tank | Rot from stagnant, dirty water. | Immediately empty, rinse, and refill the tank with fresh water. If the rot is widespread, the mother plant may be dying. Ensure good air circulation. |
| Leaves Pale or Bleached | Too much direct sun or overexposure. | Move the plant to a spot with filtered or indirect light. This is especially true for soft-leaved varieties like Guzmania. |
| Entire Plant Turning Brown and Drying Out | Natural decline post-flowering (monocarpic). | This is normal. Focus your bromeliad care on the growing pups at the base. |
| White, Cottony Pests on Leaves | Mealybugs (common houseplant pest). | Treat immediately with a cotton swab dipped in rubbing alcohol. Check the undersides of the leaves and where the leaves join the stem. |
- For regional advice on bromeliad care in specific environments, including outdoor planting recommendations, the Clemson Home & Garden Information Center offers excellent, science-backed guidance. You can find more information on their general plant care resources here.
By shifting your mindset away from conventional root-based watering and focusing on the unique needs of the central tank and the epiphytic root system, you can easily master bromeliad care. These plants offer months of breathtaking color and provide a fascinating, continuous cycle of life, giving birth to the next generation just as the previous one fades. Embrace the unique requirements of the Bromeliad, and you will be rewarded with a continuous, colorful display of tropical life in your home.