The moment a potato plant’s foliage begins to change color, one question begins to dominate every gardener’s thoughts: When to harvest potatoes?
This simple query holds the key to the entire season’s success. Harvesting too early results in tiny, thin-skinned tubers that won’t store. Harvesting too late risks rot, pest damage, and disappointment. The secret to a perfect, bountiful crop is not in the planting or the tending, but in mastering the art of timing.
This guide will serve as your complete roadmap to confidently determining the precise time when to harvest potatoes, whether you are seeking the delicate flavor of new potatoes or a hardy, maincrop supply destined for the root cellar. We will break down the crucial visual cues, the essential timing factors, and the must-do pre-harvest tests that guarantee you maximize both the yield and the storage life of your crop.
Part I: The Crucial Timing Factor: Understanding Potato Types
The decision of when to harvest potatoes begins immediately after planting, as the timing is fundamentally linked to the variety you chose. Potatoes are categorized by their maturity time, ranging from quick-maturing “earlies” to slow-growing “maincrop” varieties.
1. First Earlies (New Potatoes)
These varieties are typically ready for the first stage of when to harvest potatoes much sooner, usually around 10 to 12 weeks after planting. They are harvested while the plant is still green and actively growing. The skin is thin, and the flavor is delicate and sweet. Knowing when to harvest potatoes of this type is about anticipating a small, high-quality, immediate meal, not long-term storage.
2. Second Earlies
These sit between the two extremes, taking about 13 to 15 weeks. They offer a larger yield than first earlies and can be used as new potatoes or left a little longer to mature, providing slightly thicker skin. Understanding when to harvest potatoes in this category offers flexibility.
3. Maincrop (Storage Potatoes)
This category takes the longest, requiring 15 to 20 weeks, or even more, to fully mature. These are the potatoes bred for high yield and, critically, for long-term storage. Determining when to harvest potatoes of the maincrop type requires patience and strict adherence to the visual signs of maturity, as rushing this step will ruin the storage quality.
Part II: When to Harvest Potatoes for Immediate Use (New Potatoes)
If your goal is the small, waxy, delicious new potato, you do not wait for the plant to die back. Instead, you look for the appearance of the flowers.
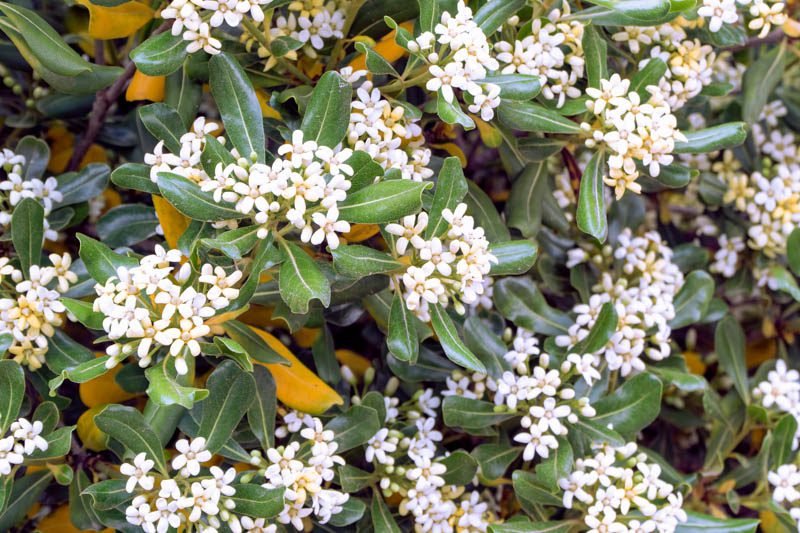
Sign 1: The Appearance of Flowers
Approximately two to three weeks after your potato plants begin to flower, they will have developed a set of small, tasty tubers. This is the first signal of when to harvest potatoes for new varieties. The plant will still be lush, green, and healthy.
Sign 2: The Gentle Test (Bandicooting)
The most reliable way to know when to harvest potatoes that are new is to perform a small, non-destructive test.
- Locate the Edge: Gently use your fingers to probe the soil at the very edge of the potato plant’s mound, away from the main stem.
- Feel for Tubers: Feel for marble or golf-ball sized potatoes.
- Harvest and Replace: If you find them, you can carefully pull away a few small tubers without pulling up the whole plant. Gently replace the soil, allowing the rest of the potatoes to continue growing. This method lets you enjoy new potatoes over several weeks, delaying the main decision of when to harvest potatoes fully.
Part III: The Definitive Signs for When to Harvest Potatoes (Maincrop)
For maincrop varieties, the entire focus shifts to skin thickness and tuber readiness for storage. This is where patience truly pays off. The plant gives clear, unmistakable signals for when to harvest potatoes intended for the long haul.
Sign 3: The Critical Haulm Dieback
The most visible and important signal for when to harvest potatoes for storage is the natural decline of the foliage, known as the haulm.
- What to Look For: The vibrant green stems and leaves will slowly begin to yellow, wilt, and eventually turn brown and completely collapse to the ground. This process signals that the plant has finished its job: it has stopped producing energy in the leaves and has directed all its remaining energy and starches down into the tubers for final growth and hardening.
- The Waiting Period: The trick to knowing when to harvest potatoes is not to dig immediately after the haulm dies back. Once the foliage is completely dead, you must wait an additional two to three weeks. This non-negotiable waiting period is vital for the tuber skins to “set,” or harden, transforming them from fragile new potatoes into durable storage potatoes.
Sign 4: Deliberate Haulm Removal (For Disease Control)
Many experienced gardeners do not wait for the natural dieback. Instead, they cut the haulm down deliberately (known as “haulm-killing”) about two weeks before their planned harvest. This is done to:
- Prevent Disease: If there is any sign of blight or other foliar diseases, cutting the stems removes the pathway for these pathogens to travel down into the tubers, protecting your stored crop.
- Accelerate Skin Set: It forces the plant to shut down and accelerates the skin-setting process, giving you more control over when to harvest potatoes.
Sign 5: The Skin Set Test (The Rub Test)
The skin-set test is the single most reliable way to confirm when to harvest potatoes for long-term storage. If you only remember one sign from this entire guide, make it this one.
- Dig a Sample: Two weeks after the haulm has died back or been cut down, carefully dig up a single test plant (you may have to sacrifice one).
- The Rub: Pick up one of the largest tubers and gently but firmly rub the skin with your thumb.
- The Verdict:
- If the skin rubs off easily (like paper): The potato is not ready. The skin is too thin and will easily bruise or scrape, leading to quick rot in storage. You must wait another week or two.
- If the skin resists rubbing and remains firmly attached: Congratulations, your potatoes are ready! The skin has set, creating the necessary protective barrier that enables long-term preservation. This is the green light for when to harvest potatoes en masse.
Part IV: Essential Environmental Factors Affecting Harvest Timing
While the plant’s signals are paramount for determining when to harvest potatoes, external factors like soil conditions and weather also play a significant role.
Drying Out the Soil
A week or two before the scheduled harvest date, stop watering your potato plants entirely. Dry soil is essential because:
- Digging Ease: Dry soil is lighter, less compacted, and easier to sift through, making the physical process of when to harvest potatoes much simpler.
- Disease Prevention: Tubers harvested from wet, soggy ground are highly susceptible to disease and rot almost immediately, regardless of how well the skin has set.
Waiting for the Right Weather
Never attempt to harvest in the rain or immediately after heavy rainfall. The ideal day for when to harvest potatoes is a cool, cloudy, dry day. If possible, plan to do the digging in the morning when the soil is still cool.
- Avoid Heat and Sun: Potatoes are sensitive to sunlight and heat immediately after digging. Sun exposure can cause greening (solanine production) in a matter of hours. Always move your freshly dug tubers to a shady, cool location immediately.
Part V: Post-Harvest Care and Longevity
Understanding when to harvest potatoes is only half the battle; knowing what to do immediately afterward is the other half. The steps of curing and storage determine whether your potatoes last six weeks or six months.
The Crucial Curing Process
Curing is the two-week process that follows when to harvest potatoes for storage. It heals any minor nicks, bruises, and abrasions the potatoes might have sustained during digging and further thickens the skin.
- The Environment: Curing requires a high-humidity environment (85 to 95%) and a moderately warm temperature (50°F to 60°F or 10°C to 15°C). A humid cellar or a covered area in a garage works well.
- The Method: Simply brush off any large clumps of soil. Do not wash them. Lay the potatoes out in a single layer on newspaper or in slatted crates, ensuring good air circulation.
Long-Term Storage Conditions
After curing, inspect the potatoes and discard any that are soft, damaged, or showing signs of mold. The healthy ones are ready for long-term storage.
- Cool and Dark: The ideal long-term storage temperature is cool, between 35°F and 40°F (2°C to 4°C), and totally dark. Any light will lead to greening.
- Containers: Use breathable containers like burlap or mesh bags, cardboard boxes with ventilation holes, or slatted wooden bins.
Outbound Link Suggestion: For more detailed information on soil preparation and hilling techniques that lead to a better crop before you even consider when to harvest potatoes, the RHS provides a reliable resource: RHS Guide to Growing Potatoes.
Part VI: Troubleshooting: Common Mistakes in Timing
Even with the best intentions, gardeners often encounter issues that complicate the decision of when to harvest potatoes.
Problem 1: The Haulm Won’t Die Back
Sometimes, especially in containers or gardens with rich soil and late-season nitrogen feeding, the potato haulm stays stubbornly green well past the expected maturity date.
- The Solution: If you are past the expected harvest window (e.g., 20 weeks for maincrop) and the haulm is still green, you must intervene. Cut the haulm down to the ground. Wait the mandatory two weeks, then perform the skin-set test (Sign 5). You must rely on the tuber maturity rather than the plant’s visual state to know when to harvest potatoes in this scenario.
Problem 2: Pests and Diseases Appear Late Season
If you observe late blight or a heavy infestation of Colorado Potato Beetles in the weeks leading up to the expected harvest, you may need to move up the schedule for when to harvest potatoes.
- The Solution: Cut the haulm down immediately to prevent the disease or pests from transferring their damage to the tubers. Again, wait two weeks for the skins to set, and then harvest. A slightly undersized crop is better than losing the entire harvest to rot.
Internal Link Suggestion: Protecting your crop is key to determining when to harvest potatoes successfully. For guidance on addressing diseases, consult our resource on garden health: Guide to Common Garden Fungal Diseases and Prevention.
Part VII: The How-To Context for When to Harvest Potatoes
While the timing is the main focus, a brief section on the physical process of when to harvest potatoes ensures the crop is retrieved without damage. Bruising is a common cause of short storage life.
1. The Right Tool
Use a digging fork, not a sharp spade. The prongs of the fork are less likely to slice through the tubers.
2. The Gentle Radius
Remember, tubers do not grow directly under the main stem. They spread out. When deciding when to harvest potatoes, always plunge the fork 12 to 18 inches away from the central stem. Angle the fork downwards and outwards.
3. The Lift and Search
Gently lever the clump of soil upwards. Once lifted, use your hands to carefully sift through the loosened soil. The potatoes will be scattered. Take your time; the entire point of determining when to harvest potatoes is ruined if you stab or bruise them during the digging process.
4. The Container Method
If your potatoes are in grow bags or barrels, the process of when to harvest potatoes is easier. Simply tip the container onto a tarp and let gravity do the work. Sift through the compost with your hands.
Conclusion: Mastering the Harvest
When to harvest potatoes is not a guessing game; it is a calculated decision based on the potato’s life cycle. By moving beyond a simple calendar date and focusing on the three essential signals—the death of the haulm, the two-week wait, and the final skin-set test—you move from a beginner grower to a skilled potato expert.
A perfectly timed harvest ensures a superior taste for your table and a bounty that will sustain you throughout the winter. Take the time to observe your plants, be patient with the curing process, and the reward will be a season’s worth of perfectly formed, durable, and delicious homegrown potatoes. Now you know precisely when to harvest potatoes for maximum yield and longevity. Happy digging!